A while ago, we blogged about how to make Twitch panels using Streamlabs Panel Maker . Today, we’re going to discuss how to add your panels to your Twitch channel.
Visit our website to start creating Twitch Panels right away.
Do You Need Twitch Panels?
While Twitch panels are technically not necessary for streaming, the value they provide is well worth spending time to make them look good. Twitch panels are a fantastic way to promote tip pages, social media, and other important links.
Every broadcaster wants their channel to stand out, but doing that is easier said than done. If you don’t have access to image editing software, or you don’t want to pay a designer, Streamlabs comes with various creative tools to help you take your channel to next level. Our Twitch panel maker is one of the best ways to get custom panels in minutes.
Be sure to read our step-by-step guide to learn how to create your own custom Twitch panels.
How to Add Panels to Your Twitch Channel
Once you have your panels, you will need to add them to your Twitch profile. Here’s how:
Step 1: Log in to your Twitch account.
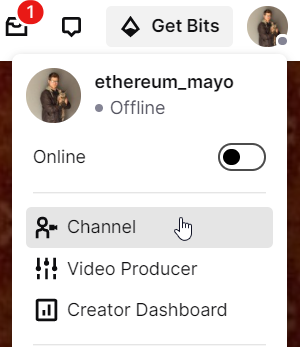
Step 2: Click on your avatar on the top right of the screen. Click on “Channel” from the drop-down menu.

Step 3: From your channel page, click the “About” button under your name and followers.

Step 4: At the bottom of the screen, click the “Edit Panels” toggle to allow you to customize your about me section.

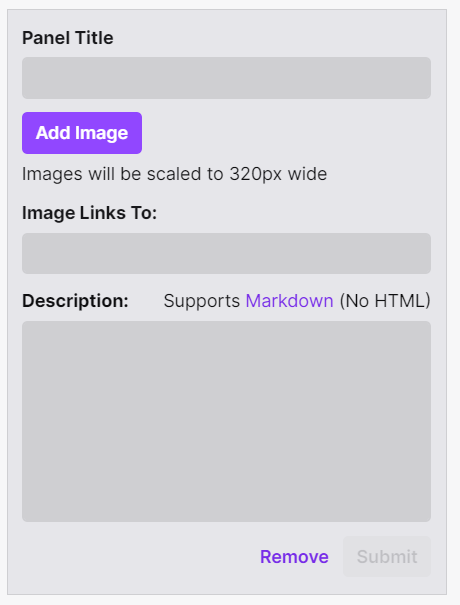
Step 5: On a panel box, click the “Add Image” button.

Step 6: Upload or drag and drop a panel image from your computer.
Step 7: Add a description of the panel and add a URL you want the image to link to.
Finally, press submit to add the panel, and you are done! You can follow this process to add any number of panels you’d like to add to your stream.
If you have any questions or comments, please let us know. Remember to follow us on Twitter , Facebook , Instagram , and YouTube .
You can download Streamlabs Desktop here.