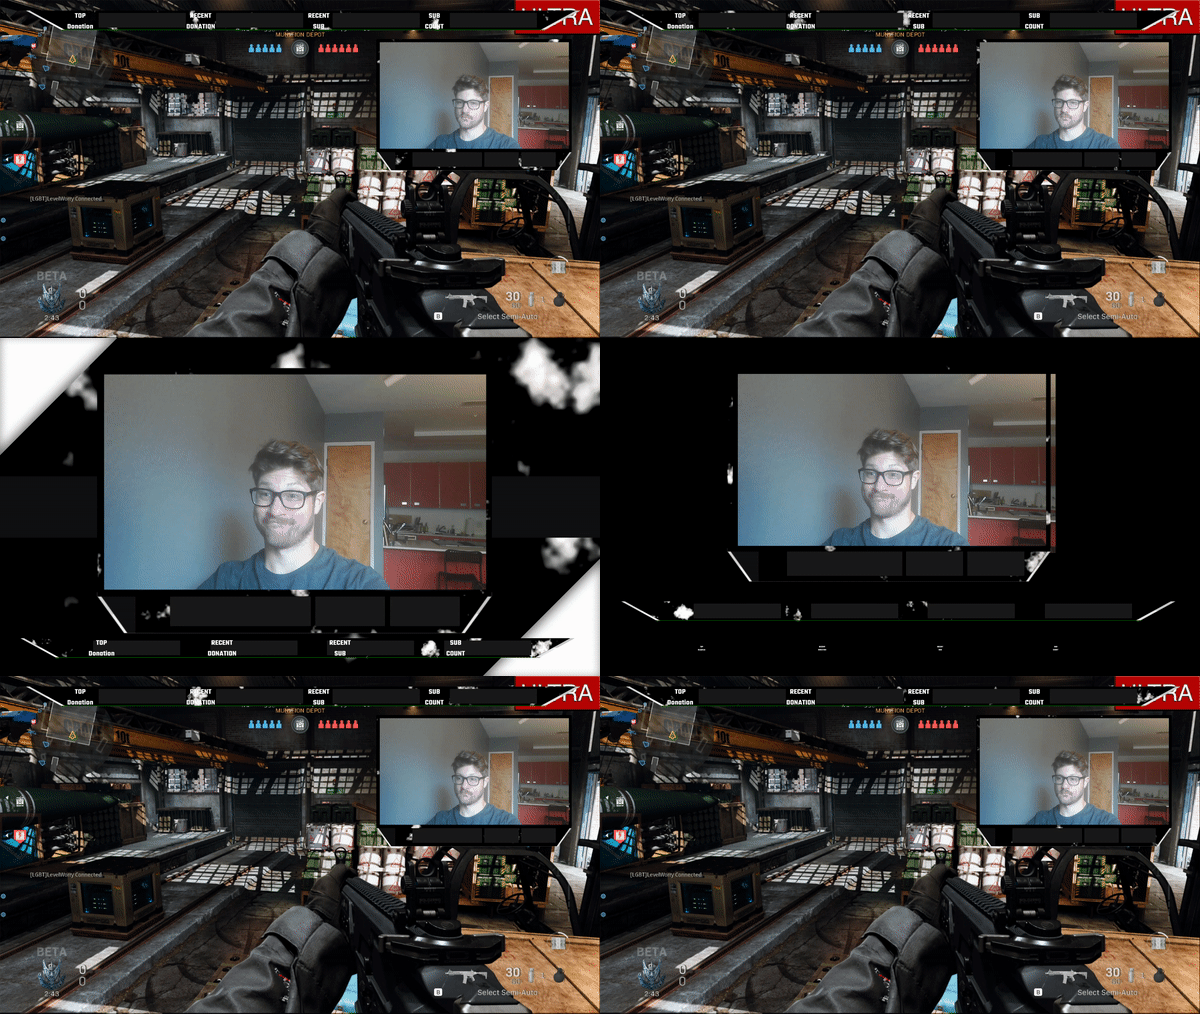
Motion Effect is now integrated with Streamlabs Desktop. Now you can easily create custom transitions for your scenes. It is a great way to create a professional-looking stream that captures the attention of new viewers. While it is possible to buy overlay themes with custom transitions, Motion Effect lets you animate scene transitions by yourself.
Today, we’ll show you how to add and customize a Motion Effect scene transition. Let’s get started.
How it Works
The Motion Effect scene transition will animate a source that is present in more than one scene. In the example below, I have my webcam source present in my “Live” scene and my “Just Chatting” scene.

Instead of a traditional cut or fade, it moves from one location to the other. If there are sources that exist in one and not the other, they will zoom in/out instead.
How to add a Scene Transition
- Open Streamlabs Desktop and click the arrow in between the two lines to open the Scene Transitions menu.
 pic 1.png)
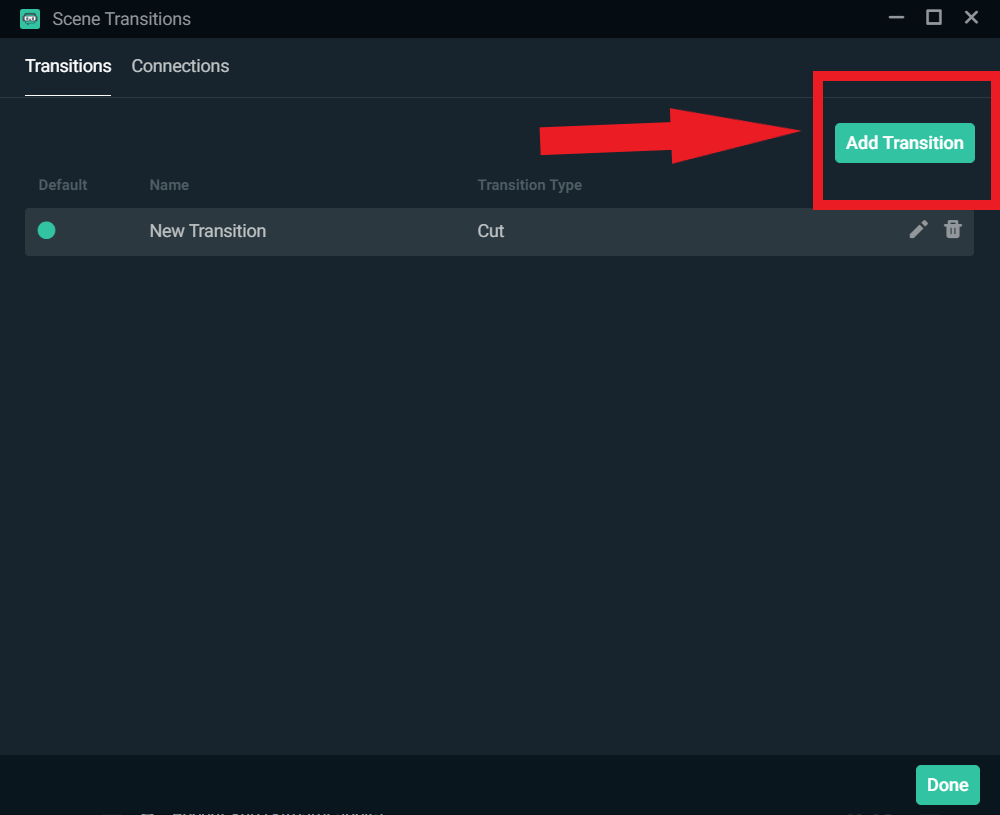
2. In the “Scene Transition” menu, click on “Add Transition”.

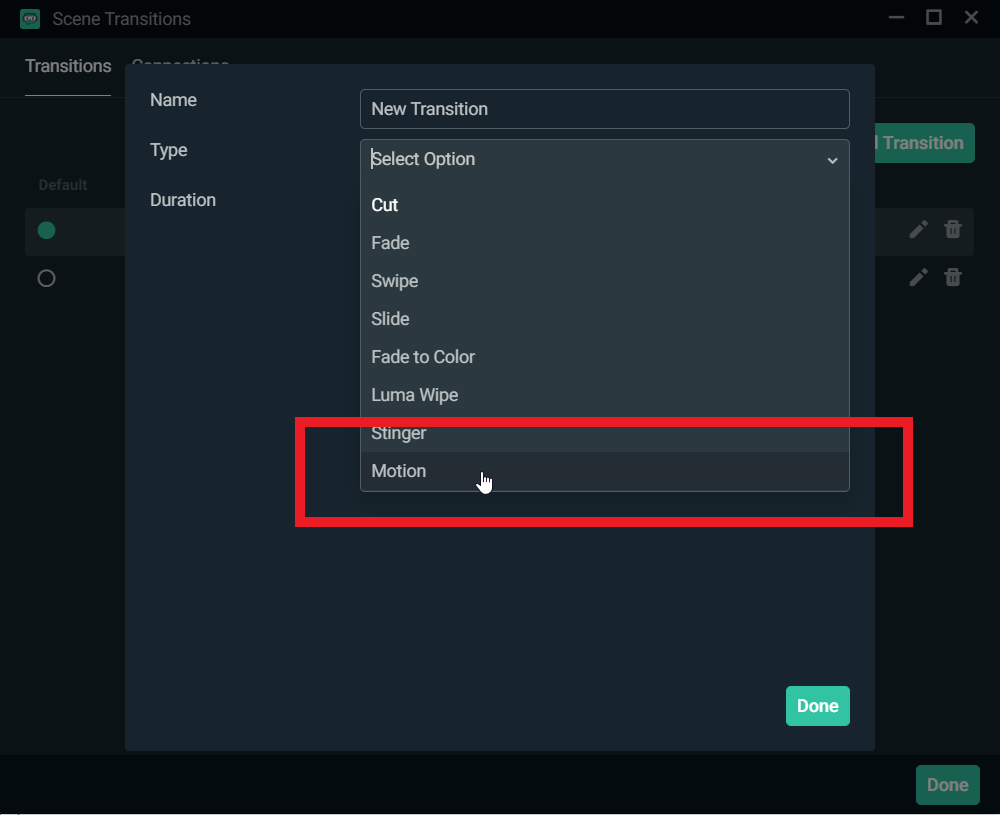
3. Click on “Type” and scroll down until you see “Motion”.

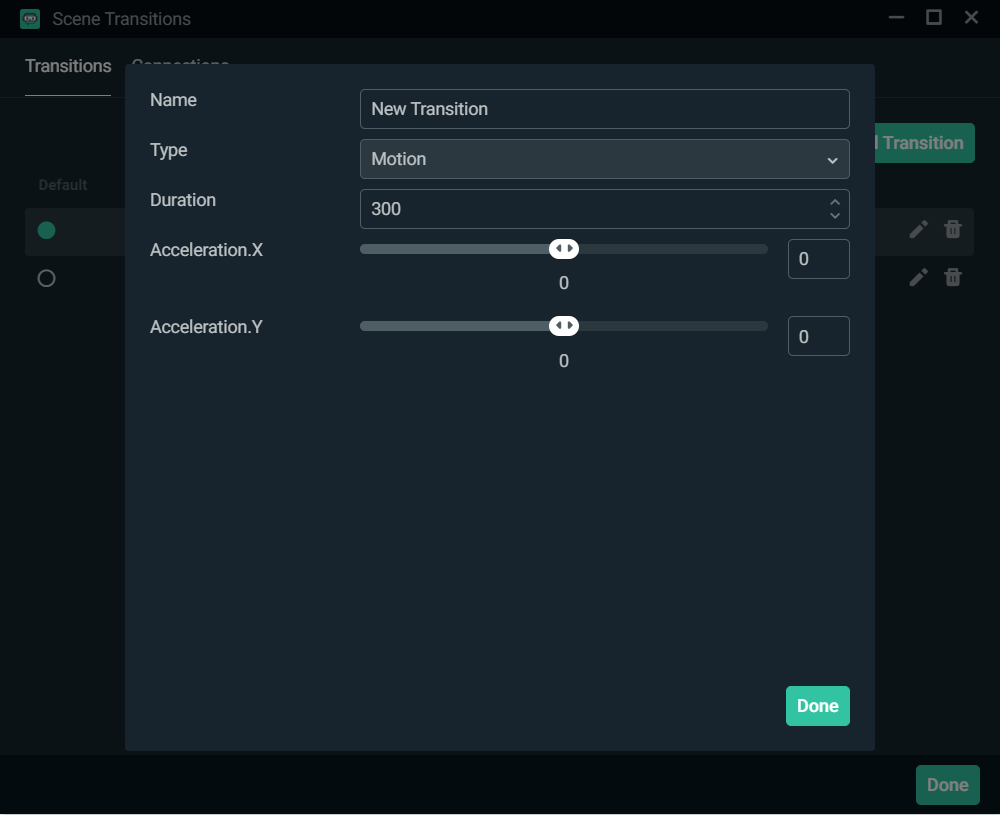
4. The duration field determines how long the source will take to get from one spot to another.

5. The acceleration sliders will make your source start fast and slow down, or start slow and speed up, depending on how you set it up.
Now your scene transitions look professional and are ready for your live stream. If you have any questions or comments, please let us know. Remember to follow us on Twitter, Facebook, Instagram, and YouTube.
You can download Streamlabs Desktop here.
Read more from Streamlabs: